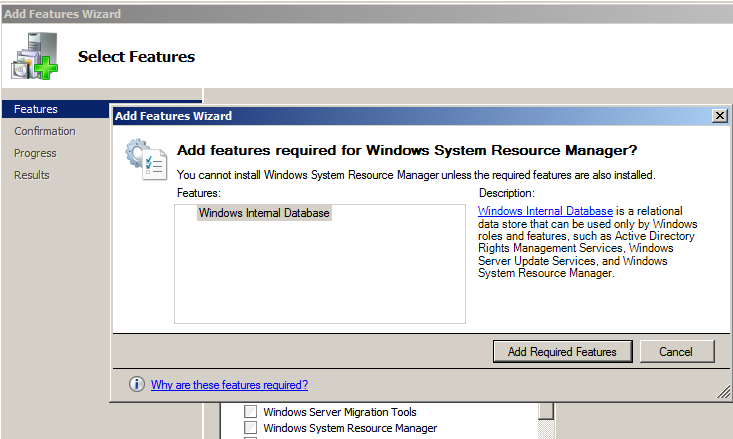
Open Server Manager and Select ‘Features’. Scroll down to the ‘Windows System Resource Manager’ option and click to select. If the ‘Add Features Wizard’ opens click the button to ‘Add Required Features’.
Click ‘Next’ and ‘Install’ to begin the installation. Once the installation is complete click to close the install wizard.
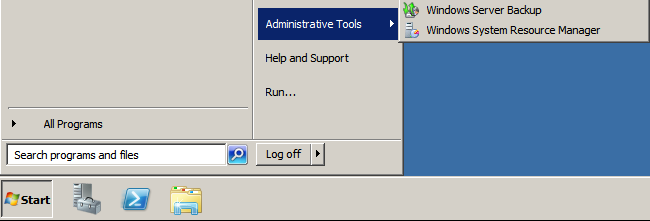
To begin configuring Windows System Resource Manager navigate to Start, Administrative Tools, Windows System Resource Manager.
Ensure This computer is select and click ‘Connect’ in the Connect to computer dialog.

Expand Resource Allocation Policies and select ‘Equal_Per_Session’. On the right hand side click ‘Set as Managing Policy’. Click ‘OK’ to the message “The calendar will be disabled. Do you want to continue?”.

Leave a Reply